sites
- home
- dreamscenes
- windows themes
- youtube intros
- 3D videos
- 3D gallery
- 3D formats
- tools
- f.a.q.
- guestbook
- about us
- contact
channels


partners
tips
share


more
tools
info
Free Software: You can find our free desktop tools XPScene, Screen2Dream and WPTimer in the tools section: Read more
- 2D to 3D tutorial:
Convert your 2D videos to 3D content with the easy-to-use software tool, MakeMe3D:

Getting Started: Before you take your first steps, you should download the latest version of makeme3D on the developers site: www.makeme3d.net. Make sure your PC meets the recommended system requirements. Download the "Voyager" dreamscene from our sci-fi gallery. Optional, you should have anaglyph glasses (e.g. red-cyan or green-magenta) to see the 3D effect in the makeme3D preview window.
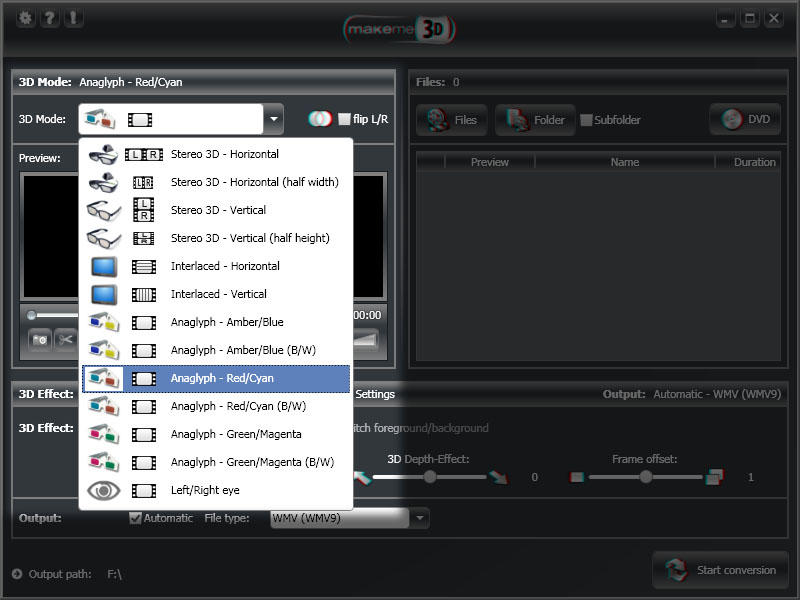
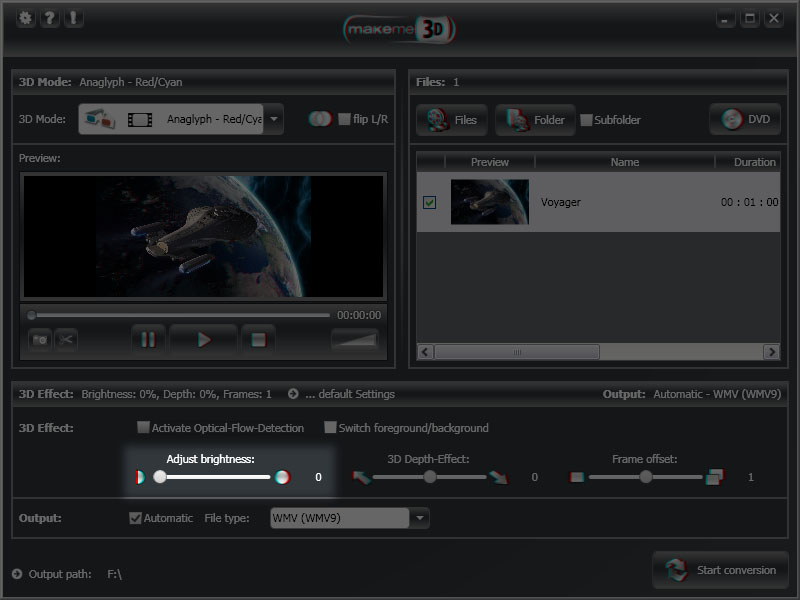
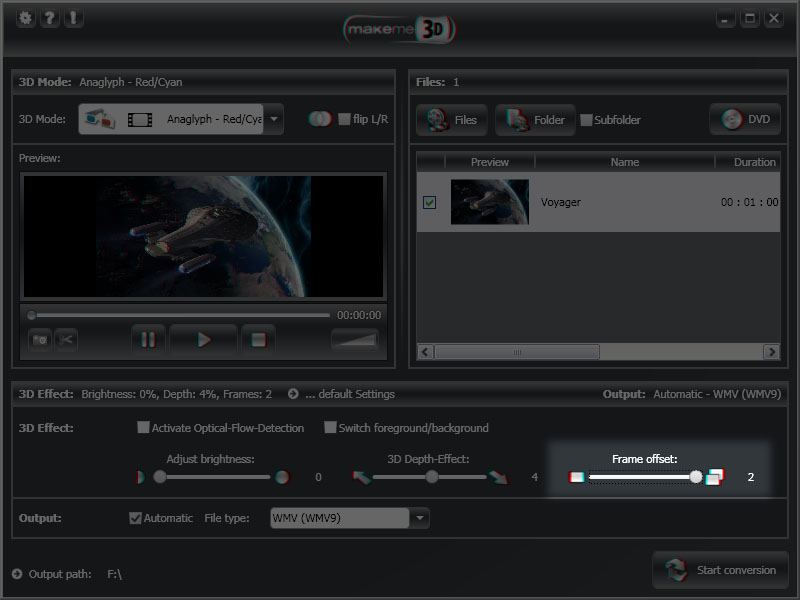
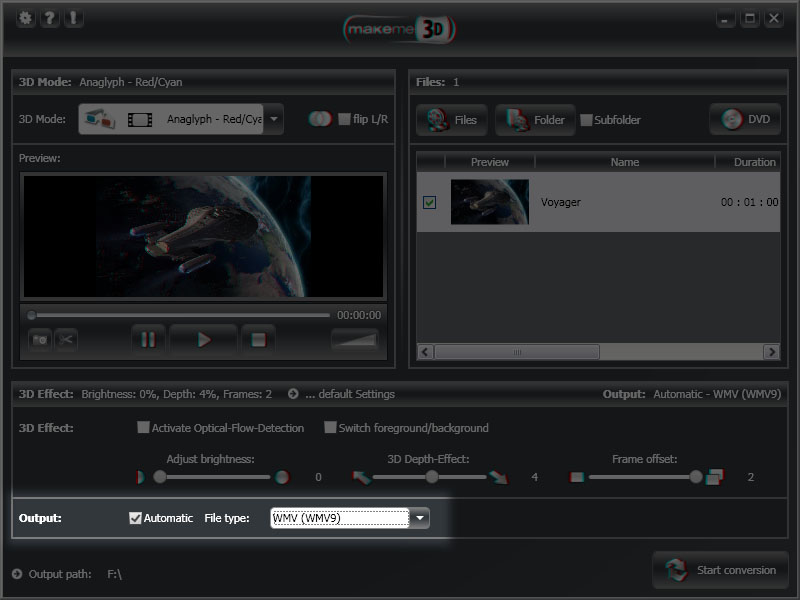
First of all, select the 3D output format over "3D-Mode", we will use red-cyan for this tutorial (see 3D-formats for details). Make sure "flip L/R" is not checked, this option is only needed for e.g. some special hardware or youtube's S3D player (more information: YouTube 3D).
Now add your "Voyager" 2D video clip to the convert-list, just click on the "Files"-Button or simply drag and drop the video-file to the list.
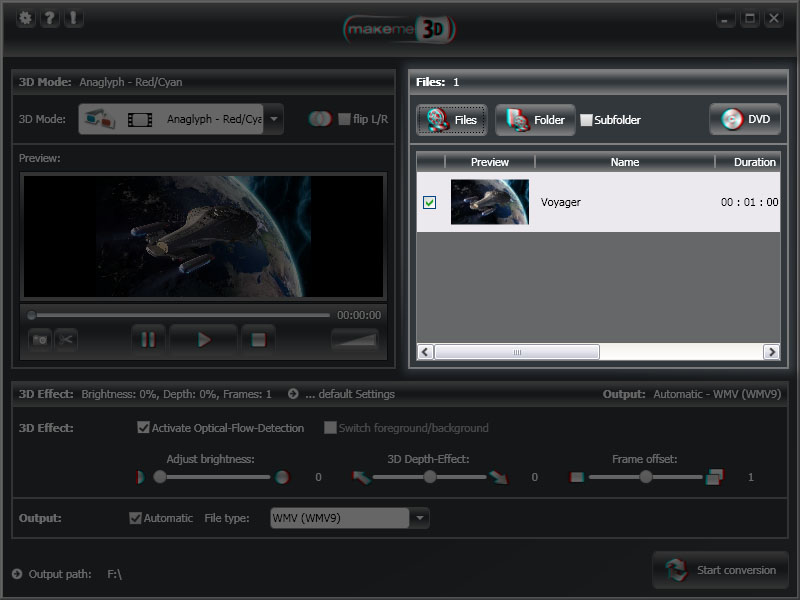
In most cases your done at this point, and you can convert your 2D clip into 3D by clicking the "Start conversion" button. The motion analysis (optical-flow detection) used by makeme3D tries to find the objects and their alignment in the video frames and creates one image for the left eye and a corresponding image for the right eye.
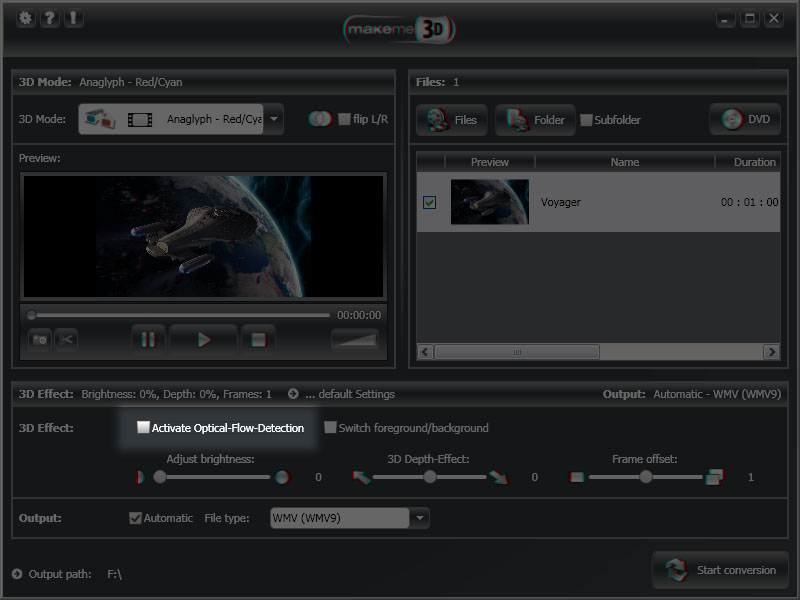
In some cases like very short videos, synthetic clips or dreamscenes you should use customized settings to get the best 3D result. We will use our own settings here to convert the "Voyager" clip.
Disable the "Optical-Flow detection" under settings. It works great for normal movies, TV shows or handheld camera recordings, but can fail on short clips like dreamscenes (because of to less information for a correct motion analysis).
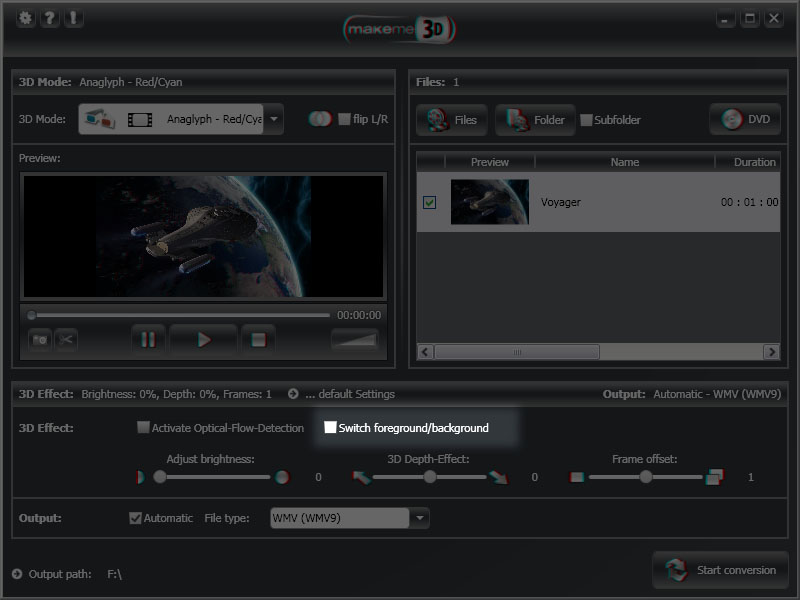
Now you should take a look on your video in the 3D preview player with your anaglyph glasses. If the 3D effect looks broken or some kind of disordered (pseudo 3D), you can use the "Switch foreground-background" checkbox to manually correct the image alignment. For this tutorial you should use the default settings for this option (checkbox disabled).
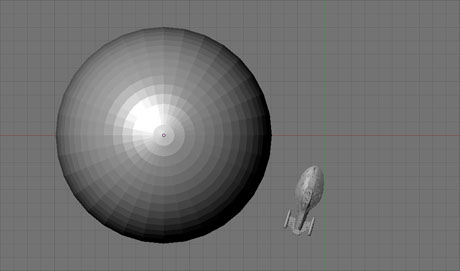
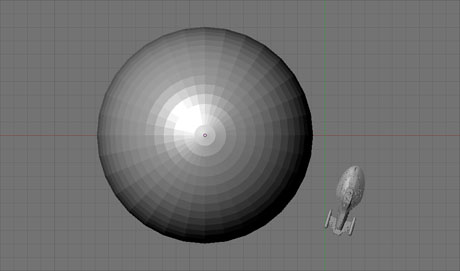
Normal 3D view (sample image shows pre-rendered scene from the top):
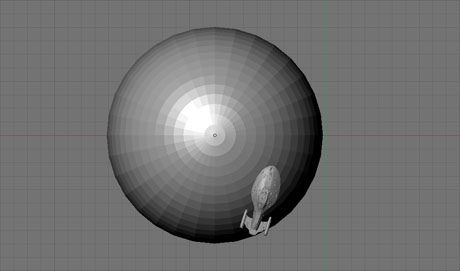
Disordered 3D (sample image shows pre-rendered scene from the top):
After you have found the best setting for the "foreground-background" switch, you should also play with the "Brightness", "3D depth" effect and the "Frame offset" slider.
"Brightness": Here you can adjust the brightness for the output video. If your 3D glasses will darken the resulting video to much, you can adapt the brightness with this option (we didn't have changed the brightness value for the conversion, because this input video seems to be bright enough).
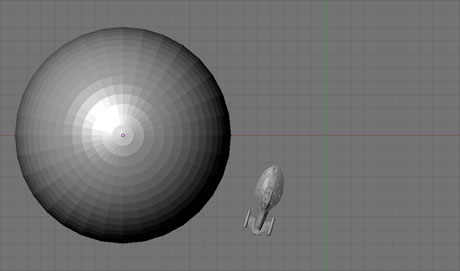
"3D depth" effect: You can put the the complete scene into the back or into the front with "3D depth" to enhance the 3D depth illusion. See sample images for details. To put the starship into the front, so it will slightly pop out of your screen, select a value of +4
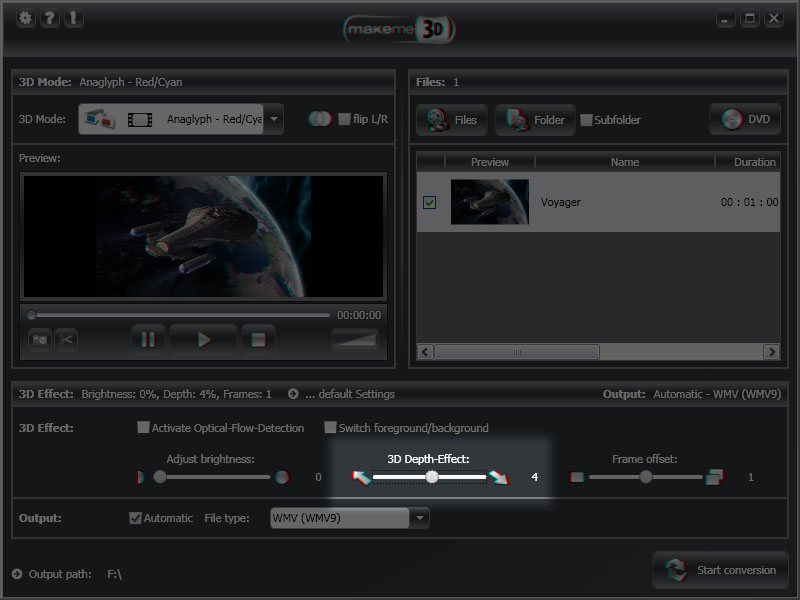
3D depth, plus (sample image shows pre-rendered scene from the top):
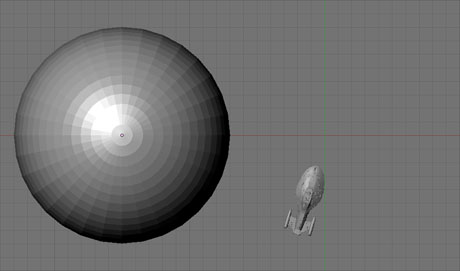
3D depth, minus (sample image shows pre-rendered scene from the top):
"Frame offset" slider: This option will set the number of frames used to compute the 3D image. If the motion is very slow, it could help using 2 frames offset instead of the default 1 frame.
Frame offset = 1 (sample image shows pre-rendered scene from the top):
Frame offset = 2 (sample image shows pre-rendered scene from the top):
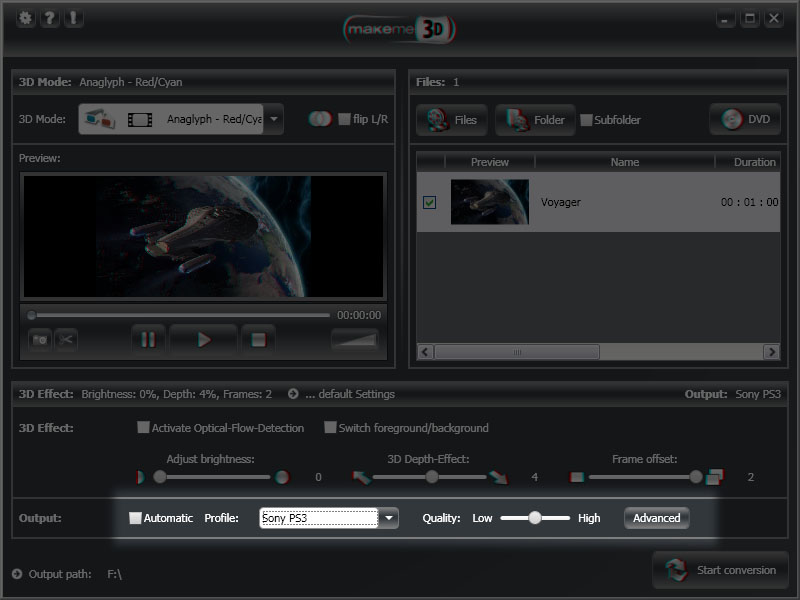
Select output-format. Use automatic mode to keep the input resolution and framerate (bitrate is automatically calculated), or use a profile based format e.g. for the use with Apple's iPad or Sony's PS3.
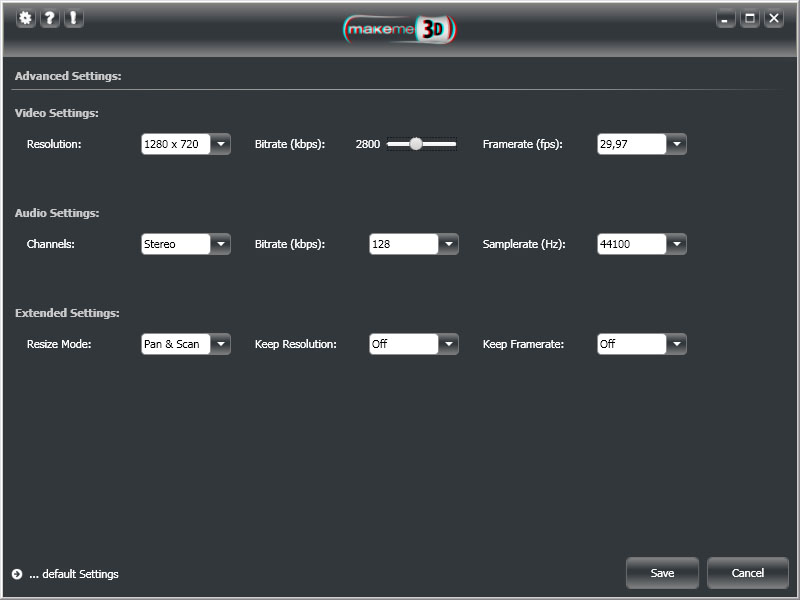
PS3 profile based output, with detailed (advanced) settings:
Now select your output-path with a click on the path label.

And hit the "Start" button to start the 2D to 3D conversion.

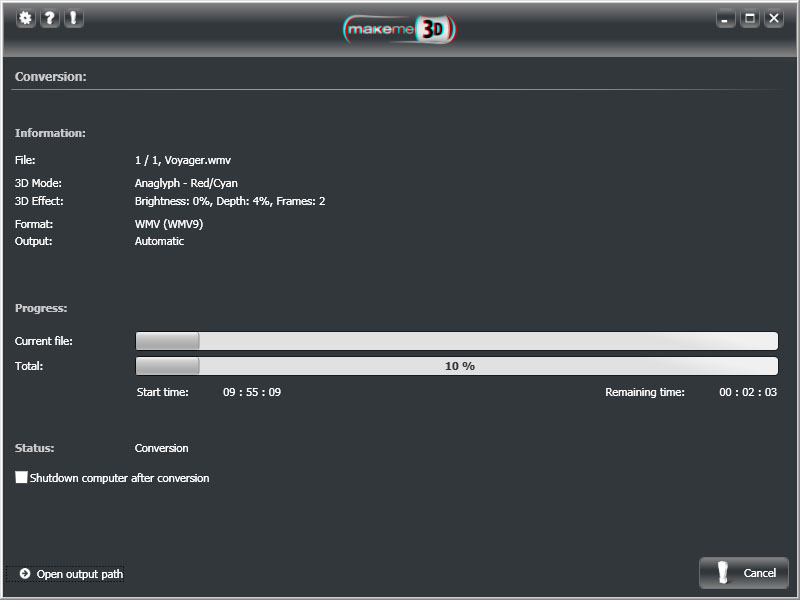
Your resulting video should look like the following sample image:

- Tip:
Preview: Take a look on our upcoming dreamscenes and check out our video preview: Show preview